Have you ever tried recording the screen and webcam at the same time? For those who don’t know, it is possible to record the screen and webcam at the same time on Windows. There are several software applications available that can help you achieve this and iTop Screen Recorder is one of them.
Launched on May 17, 2021, the iTop Screen Recorder gained popularity among users for effective screen recording of HD videos without any charges at a fast speed. The screen recorder enables screen recording at high FPS without dropping frames.
But how does one whose using the screen recorder for the first time understand the mechanism?
Let’s find out!
Possible Usage of Recording Screen and Webcam at the Same Time:
Recording the screen and webcam at the same time on Windows can be useful in various situations:
Tutorials and Demonstrations
If you’re creating instructional videos, tutorials, or demonstrations, recording the screen and webcam simultaneously allows you to show both your screen activities and your face or physical actions. This can enhance the viewer’s understanding and engagement by providing visual cues and explanations.
Video Presentations and Lectures
When giving online presentations or lectures, combining screen recording and webcam footage enables you to showcase your slides or content on the screen while maintaining a personal connection with the audience through your webcam feed. It adds a human touch to the presentation and can help establish rapport.
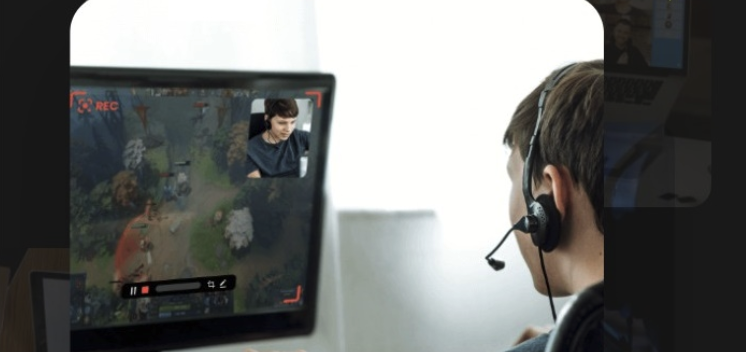
Gaming and Streaming
For gamers and streamers, capturing the screen and webcam simultaneously is common. It allows you to show your gameplay footage on the screen while overlaying your face or reactions in a small window using the webcam feed. This adds a personal touch, enhances interaction with viewers, and can create a more engaging experience.
Video Interviews or Meetings
During remote interviews, video conferences, or online meetings, recording the screen and webcam together can capture both the shared screen content (such as presentations or documents) and the participants’ reactions or expressions. This can be helpful for reviewing the meeting later or creating documentation.
Content Creation and Vlogging
Content creators and vloggers often utilize simultaneous screen and webcam recording to produce engaging videos. It allows them to present content, demonstrate software or processes on-screen, and maintain a connection with their audience through their webcam feed.
How to Record the Screen and Webcam Simultaneously on Windows 10 and 11 with iTop Screen Recorder?
1. First of all, you’ve to download the iTop Screen Recorder from iTop official website.
2. Without doing much, the screen recording software would be installed on your computer. Just make sure to open the webcam at the same time.
3. You can choose the ‘size’ of the screen to be recorded later accordingly.
4. Speaker, Mic and Mouse options are open if needed.

5. Start the recording by pressing the REC button. You can pause or stop it as needed.
6. All recording are saved in the video list, you can check it there.
Pros
- Records videos without lagging.
- Records videos without a time limit.
- Has an advanced editor.
- Helps reduce background noise.
Cons
- Might not work on Mac OS.
Things to Keep in Mind When Recording the Screen and Webcam at the Same Time on Windows:
When recording the screen and webcam at the same time on Windows, there are a few things to keep in mind to ensure a smooth and successful recording:
Software Compatibility
Ensure that the screen recording software you choose supports simultaneous screen and webcam recording, like iTop Screen Recorder. Check the software’s documentation or features list to confirm this capability.
System Requirements
Verify that your computer meets the minimum system requirements for the screen recording software. Recording both the screen and webcam simultaneously can be resource-intensive, so make sure your system has enough processing power, memory, and storage capacity.
Placement and Positioning
Position your webcam in a suitable location where it captures your face clearly and provides a desirable angle. Consider factors such as lighting, background, and framing to ensure a professional and visually appealing recording.
Audio Settings
Set the appropriate audio sources for recording. If you want to include your voice narration, make sure the microphone is selected as the audio input source. Also, ensure that the audio levels are properly balanced and free from distortion or background noise.
Recording Area and Resolution
Determine the specific area of the screen you want to capture. This can be the full screen or a specific application window. Ensure that the recording resolution is set appropriately to match your desired output quality.
Testing and Adjustments
Before starting the actual recording, conduct a test to verify that both the screen and webcam are working correctly. Check the framing, audio quality, and any overlays or effects you may want to include. Make any necessary adjustments before proceeding with the actual recording.
File Formats and Settings
Understand the supported file formats and settings for the recorded video. Consider factors such as video codec, frame rate, and output resolution to ensure compatibility with your intended use or editing requirements.
Storage Space
Recording both the screen and webcam simultaneously can generate large video files, so ensure that you have sufficient storage space on your computer‘s hard drive or the designated storage location to accommodate the recordings. And I highly suggesting testing out iTop Screen Recorder, because it compressed the video size without quality loss according to its official media kit.